My stamping adventures

Showing posts with label MFP stamps. Show all posts

Thursday, June 5, 2025

Card swap cards

 Card swap cards

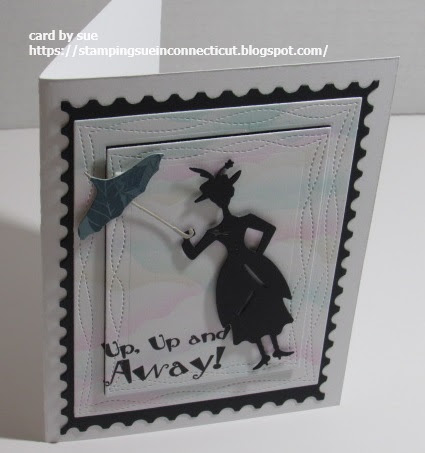
April theme for my local swap card group was card sketch. Yeah, I'm late as usual lately with posting my swap cards.  

stamp/supplies used:  Unity stamp co. Flock talk stamps, SU dsp

I missed our April get together meeting because I was at a weekend crop.

Here is the sketch we used:

I'm not much of a sketch gal but my friends like them so we usually do one or two a year in our group.  
Our May meeting was canceled because half our group had other obligations. 
stamps/supplies used:  MFP Classic car stamp set, SU ribbon-mesh-Knit embossing folder
May theme was General Masculine cards.
I'll post for June soon.

Thanks for stopping by.  Come back soon.

Monday, December 30, 2024

Accordion Flap card

 Accordion Flap card

stamps/supplies used:  MFP popcorn stamp set, SU DSP

If you follow my blog, and know me ... then you know I love a good fun fold card.  This Accordion flap card is a WINNER!

measurements/instructions:

base card:  11" x 4 1/4"  score at 2 1/2", 3 3/4", 6 3/4" & 8 1/4"

square layers:  4" x 4", 4" x 3 1/2", 4" x 2 1/4"  fold mtn/valley/mtn/valley


DSP layers:  3 3/4" x 3 3/4", 3 3/4" x 3 1/4" & 3 3/4" x 2"

white layers:  3 1/4" x 1 1/2", 3" x 2 3/8"

Adhere all layers together.  Adhere the panels to the scored card base.  BUT only put adhesive on left side of panel.  If you put adhesive on full panel the card will NOT open.  Also keep in mind your layers may differ from mine depending what you stamp.

Thanks for stopping by.  Come back soon.

Wednesday, October 2, 2024

Simple cards

 Simple cards

I'm back!  Today I am just starting off with a few, what I call simple cards.

stamps used:  MFP 
I used Catherine Pooler inks, which if you have been following my blog you know are my favorite inks.  At least for the past 5 or 6 years.  

basic instructions:

1.  stamp image about 1 inch from the bottom of the card (4" x 5 1/4") panel with chosen color ink.

2.  add strip of pattern paper (SU paper shown here) on the bottom of stamped card panel.

3.  stamp saying (Altenew) image.


4.  add (Altenew) enamel dots.  These just happen to my favorite choice.

You can make up a set of these cards for little gifts.

Thank you for stopping by.  Come back soon.


Thursday, April 4, 2024

Fly away with Mary Poppins/video

 Fly away with Mary Poppins

Actually in my card Mary Poppins is sliding away on my ribbon slider card.

stamps/supplies:  MFP saying Up, up..., Sizzix TH The Park die set

I'm call this character Mary Poppins but, I guess, legally you can't name these dies because she is licensed by Disney.  The die set is called The Park but she does make you think of Mary Poppins.  Anyways I made an old favorite moving card that is a Ribbon Slider card.  

Instructions:

 1.  Make any size card that works for you with a layer for the sliding character.

2. Cut 2 parallel lines 1/4" to 1/2" apart for the moving mechanism on the layer that will have the character. Make
the length of cut to accommodate your card.
3. Cut ribbon twice the size of your card. Cut strip of cardstock to wrap,
and tape ribbon that will slide back & forth on your card.  The ribbon gets tape to the sliding strip only. Make 2
more strip wraps, and tape each one on ends of parallel lines with ribbon
threaded through but do not tape ribbon to strips. These will be end
stoppers.

4. Tape cardstock with sliding mechanism that you stamped scene to base
card.  On this card I cut out a cloud template to create the background.
5. Use mounting tape to attach your image on movable strip which will go
around parallel lines. 
6. Pull your ribbon and see what happens!
Here's a short video I did a few years ago showing how the ribbon slider works.
Another basic card with same The Park die set.

Thanks for stopping by.  Come back again soon.


Monday, March 18, 2024

Meadow Reflections

 Meadow Reflections

Unfortunately we need sympathy cards, so I decided to make a few to have on hand.

stamps used:  Altenew Meadow reflections stamp set, MFP stamp co. saying

Instructions:

1.  Make a reverse circle mask. 

2. Place post it notes over half of the circle mask.  Lay down cloud stencil and add color.  Remove post it notes and replace on other half of mask.  Now blend (in this sample) green ink, then put strips of masking paper over green ink.  Blend same green ink but darker over strips.  Remove strips and see the results.

3.  Remove circle mask to reveal.

4.  Stamp image in black ink over the inked circle.  Add sentiment.

5.  Layer stamped piece on black layer and green A2 card.

Thanks for stopping by.  Come back soon.

Thursday, January 11, 2024

Get well Forest Pines

 Get well Forest Pines

stamps used:  Altenew stamp co. Pine Forest embossing folder/layering stencils, White Swan Echinacea and MFP get well soon

I told you I would be using this Altenew Pine forest set again.  Remember it here in this post.  This time I used it for get well cards to have on hand in my stash.  If you look close to picture you can also see I used my favorite Unity stamp co. rectangle scallop die set.  I seem to pull this die set out just about every time I make a card, and want a layer.  Anyway, hope you like these cards with the Pine forest, and come back again soon to see what other cards, or projects I create with this embossing/layering stencil set.

Thanks for stopping by.

Sunday, December 31, 2023

Winter blessings

 Winter blessings

Happy New Year's Eve!

stamps/supplies used:  Unity stamp co. Woodland Layers stamp/stencil set, MFP&stamps snow gifts

Basic instructions:

1. Blended colors for the background.

2. used mountain/trees stencil.

3. Stamped snowman, large tree and saying.  Colored in the snowman with some color pencils. 

4.  Inside stamped saying and trees.

Each card will look a bit different with the blending of the colors.

Thanks for stopping by.  Come back again soon.


Saturday, July 8, 2023

Video - More Duoprinting with Chlorophyll

 More Duoprinting with Chlorophyll and video

I tell you once you start making prints with this technique, you can't stop!  Or maybe it's just me that can't stop!  I did this technique back in 2017 ... that's six years ago.  Scroll down to see video in this post or go duoprinting w/chlorophyll video on my you tube channel.

                                               stamps used:  MFP stamp co. for the sayings
The main thing is take a walk to pick leaves off trees, and ferns. Even herbs will print.  If you look at the cards in the second pic ... those blotches of green are dill.  


basic instructions:

1.  fold a piece of copy paper in half - open it up.
2.  cut two pieces of cardstock (I did 4 1/4" x 5 1/2") - place one of them inside the copy paper.
3.  place your leaves or herbs or any combination on cardstock.
4.  place another piece of cardstock on top of leaves/herbs.
5.  fold the copy paper over the two pieces of cardstock with the leaves/herbs sandwiched inside them.
6.  run them through Big Kick (whatever machine you own).
7.  peel the two pieces of cardstock apart and VIOLA!  beautiful nature cards.
Thanks for stopping by.  Come back again soon, and if you try this technique show me your cards.


Monday, June 19, 2023

Poppies

Poppies

It is always fun to bring back an old technique, and that is what I did with this card.

stamps used:  Stampin' Up painted poppies stamp set, sayings by MFP stamps

This technique is called random stamping, or what I like to call stamp collage.  See more on this technique in this 2009 post, and in this post.  Type collage stamping in search bar to see more.

basic instructions:

Stamp images randomly on white card with black ink.  Around the poppies stamp splatter images with light blue and yellowish inks.  Die cut stamp card with stitched edge die.  Layer onto mini die cut scallop black card, then onto yellowish color A2 (5 1/2" x 4 1/4") card.  Add some self sticking gems to finish card.

Thanks for stopping by.  Come back again soon.


Wednesday, August 18, 2021

Masculine cards

 Masculine birthday cards

stamps used:  SU-waterfront stamp set, MFP&stamps-happy birthday, Unity stamp co.-Amazing saying, Sunday Int'l-mesh background, Penny Black-tree, SU-clelebrate, MFP&stamps-happy birthday


Like everyone says masculine cards are one of the most difficult cards to create ... or ... is it just me?  Anyway, I need two masculine birthday cards for September, so I figured I better get a head start on making them.

Card #1 (top card) I got out my SU (Stampin' Up) waterfront stamp set, which I haven't used in a while, so I thought it would make good masculine cards.  Made a scene with some of the images in this stamp set ..... I like the way it came out.  I die cut the stamped card with Hero Arts infinity postage die set, then die cut straight layers with another Hero Arts infinity die set.  Layered it all on a black note card (A2 size) to finish it off.

Card #2 (bottom card) I really went old school using wood mounted stamps from back in the day.  The mesh is stamped with a kraft ink, then over stamped with the tree/sayings with black ink.  Simple but effective, I think.

Let me know what you think of my masculine cards in the comments.

Thanks for stopping by and come back again soon.

***not affiliated with above companies just satisfied customer***


Thursday, November 26, 2020

October moon swap

October 2020 had two full moons! 

stamps used:  Stampin' Up and MFP
stencils used:  various companies

Harvest moon is the closest to the autumn equinox.
Hunter's moon is the full moon that appears in October after the Harvest moon.

Happy Thanksgiving!

thanks for stopping by.  come back again soon.


Wednesday, September 23, 2020

September Moon Corn

 Corn Moon

stamps used:  MFP, Rubber Moon and Hot Potatoe

Here is my Corn Moon swap card.  This is an ongoing swap with local friends so we can stay in touch during these trying times.

Measurements:

base - 4 1/4" x 5 1/2"
black layer - 3 3/4" x 2 1/2"
white stamped layer - 3 1/2" x 2 1/4"
back layers - 4 3/8" x 2 3/4" and 4 1/4" x 2 5/8"
all the above measurements are approximately for my card.

Basic instructions:
front:
1.  base card is embossed with TH Alterations texture fade - Distressed Frame.
2.  adhere black layer and stamped corn layer to front of embossed card.
3.  the corn image is stamped onto white layer.  husks of corn are colored with marker.  corn section is paper pieced.  
back:
1.  adhere black layer.
2.  adhere white layer that has been printed with description of Corn full moon.
3.  stamp images with yellow and green ink.
4.  sayings stamped with black ink.

Simple but effective.  don't you think?

Thank you for stopping by and come back soon.
***not affiliated with any of the above companies just customer***


Monday, May 4, 2020

Get Well - Thinking of you

Stamps used:  MFP butterfly and sayings
Impression Obession Damask Floral
Me & Carrie Lou Queen's Ann flower

I like to make cards and send bunches to family or friends.  These cards are a part of a group that are going to a family member who asked for some cards, and I'm happy to oblige.  I am a die heart stamper!  

For the butterfly cards I got out some old ink pads, that I haven't used for years!  AND they are still juicy and ink up well!  They are called Encore ink pads ... not even sure if they are still made but if they are and you see them ... pick up a few ... they are great metallic colors.
For the two big flowers they were stamped with black ink over a masked blended oval.  To create the blended oval I cut out a piece of masking paper, then laid it on white card.  Blend in the colors in the open section, then remove the masking paper to reveal the blended oval.  Next, I stamped the flower over the blended oval with black ink.

You can see the other cards in the group here in this post.   
Thanks for stopping by.  come back again soon.

Friday, April 3, 2020

Sympathy style cards

stamps used:  SU Tranquil Tulips
sayings used:  Unity stamp co., MFP stamps

I was asked by a family member, if I could make a few sympathy cards, so here are a few I created.  They are simple but I feel effective for the occasion.  This flower stamp set is we call two step stamping.  With this stamp set you first stamp the larger part of the flower with a color (any color inks you own) then over stamp with the smaller image but use the same ink.  The smaller image will automatically create a shadow.  It is quite unique the way this happens.  They (SU) developed these stamps to do this with this two step stamping technique.  I made these cards into regular note cards with a little layering because I wanted to keep them simple.

Here's a look at the stamp set:


Thanks for stopping by.  Please come back again soon.