My stamping adventures

Showing posts with label Gina K. designs. Show all posts

Saturday, December 6, 2025

Full circle

 Full circle

This week with Jen Rzasa tuesday #altenewchallengelive the theme is Come full circle.

supplies used:  Gina K designs wreath stencils and stamps

This stencil makes it easy to create wreaths that you can also stamp inside of the wreath image.  I kept these two cards BIG and square, which I usually do not do.  These turned out to be 5" square cards, unfortunately when I get around to mailing them it will cost a bit more.  

I also did one more full circle leaf that I cut in half, and then made into tags or they could be bookmarks.  Either or.  
Thanks for stopping by.  Come back soon.


Friday, May 23, 2025

Faux postage cards

 Faux postage cards

stamps/stencils/dies: Waffle Flower faux postage die/stamps, GinaKdesigns flower stencils, Altenew bloom with creativity

I am having lots of fun with this postage die because you can use anything inside the spaces.  This time I used Gina K designs flower stencils ..... one is zinnia and the other is sunflower stencils.  
These big flower stencils work great with the faux postage die.
Thanks for stopping by.  Come back soon.


Wednesday, February 19, 2025

B & W with a pop of color

 B & W with a pop of color

Here's a look at my February card with my local card swapping girls.  

stamps, stencils, supplies used:  GinaK designs Hello layering stencil bundle

The theme for this month, as you can see from the title, is B & W with a pop of color.  My pop of color was yellow.  I got out a stencil bundle I have had from GinaK designs for a couple of years, that has been a favorite of mine.  I know I say a favorite of mine for this set, but as you know we all have lots of favorites.  For me it depends on the mood I'm in.

For this card I used the stencil to do a bunch of the flowers, and leaves.  I had fun with this theme because I did do b & w but I also added in some gray leaves just because I could.  Only one of the flowers are popped up with foam tape ... all the other flowers, and leaves are taped onto the card.  


Here is another one I did with red for the pop of color.  I did this card after I had done all the yellow ones so needless to say the girls got the yellow ones.  

Thanks for stopping by.  come back soon.

Monday, February 3, 2025

Zinnias

 Zinnias

I am still having fun using GinaK  Zinnia stencil set.

stamps/stencils used:  GinaK Zinnia stencil set, Simon Says So Talkative stamp set

I was at Snowflake crop which myself, and several other friends attend in Massachusetts ... that is where I played with this Zinnia stencil to make 8 cards.  The fun thing is I didn't have any sayings with me but my friend, did.  It's a stamp set from Simon Says named So Talkative, that has a lot of wonderful sayings.

Here are a couple more of the cards I did at the crop.

Basically I just placed the zinnia stencil on white card layer.  No specific placing ... just laid it down and added color.  Then I die cut the white layers with whatever dies I had with me.  I used CP inks I brought with me.  

Thanks for stopping by.  come back soon.

Thursday, January 9, 2025

hey friend

 hey friend

supplies used:  Gina K designs zinna layering stencil set

This is my card for my December 2024 local card club.  I did the 4 Corners technique which I learned from Jennifer McGuire 4 in one card technique.  Here is how I did this technique on this post of mine.  I used Catherine Pooler my favorite ink pads.

Thanks for stopping by.  Come back soon.

Friday, November 8, 2024

Merry and Bright

 Merry and Bright

It's that time of year for me to start showing my holiday card designs.  

stamps used:  GinaK designs Tapestry stamp, Altenew co. sayings inside and out

I don't own the tapestry stamp, my friend shared it with me, thank you very much.  It's a beautiful image, and then when you heat emboss it ... it really comes to life.  I multi-color embossed it.  That means I stamped the image with a clear embossing ink pad, next I sprinkled on some silver embossing powder, and gold embossing powder.  Heat embossed it with my heat tool to see the magic of embossing powder bring out the beauty of this image.  I layered the embossed panel onto a gold panel I die cut with a mini scallop rectangle die.  The shine of the gold panel just highlights the multi-colored tapestry panel.  Layered the saying, that I also gold embossed onto oval die cuts over the tapestry panel.  Added some self sticking gems to finish off the card.  Have you ever multi-colored with embossing powder?  Try it you just might like it.

Thanks for stopping by.  Come back soon.

Thursday, July 4, 2024

Happy 4th of July

 Happy 4th of July

stamps dies used:  Gina K designs Hello flowers bundle, Altenew stamp co. paper pack

Just wanted to wish everyone a Happy 4th of July day.  Have a good time with your family and friends.

Here you can see the front of my card, and inside of card.  Happy is from Unity stamp co., and 4 th is from old rubber stamps.


The ice-cream cone is from Stampin' Up.

I don't usually make this holiday cards but thought it would be nice to do ... since I had some free time.

Thanks for stopping by.  Come back soon.

***not affiliated with any of the above companies just happy customer***


Saturday, April 13, 2024

New beginnings with Moths

 New beginnings with Moths

This is another technique where you can get four cards from one stamping.  

stamps used:  GinaKdesigns New beginnings stamps/dies by Lisa Hetrick, Unity stamp co. rectangle die set

I call this technique collage stamping.

Instructions:

1.  Stamp various images on 8 1/2" x 11" cardstock.  Just stamp images randomly all over the cardstock.

2.  Cut or die cut 8 1/2" x 11" stamped cardstock into 4 cards.

3.  Layer stamped cards onto black layer, then onto pale orange A2 (4 1/4" x 5 1/2" folded card) card.

4.  Add thinking of you die cut.

See more on this post from 2009, or on this post.  If you type collage stamping in search bar you will find more.

That's it!

Thanks for stopping by.  Come back soon.

Wednesday, April 10, 2024

Spectacular Sunflowers!

 Spectacular Sunflowers!

I did some more 4 Corner cards with this layering stencil set.

stamps/supplies used:  GinaKDesigns Little Hello layering stencil bundle(sayings), Spectacular Sunflower layering stencil set

This is a fun technique that makes four cards at a time.  This sunflower stencil set is wonderful, and works great with this technique.


To see details how I do these 4 Corner cards check out this post here with lots of step by step pictures.  I used GinaKdesigns Zinnia stencil for cards in that post.

Thanks for stopping by.  Come back soon.


Wednesday, March 13, 2024

See through cards

 See through cards

I do enjoy making these see through cards, even though they do take a little patience and time.

stamps used:  all by GinaKdesigns Little Hello layering stencil bundle, Lisa Hetrick Choose Grace, Whimsy & wonder stamp/die set

This is a technique I saw done by Jennifer McGuire years ago, but she is bringing it back ... so I decided to do some of these cards, too.

Basically what you do is die cut a lot of flowers or whatever image you would like to use for this technique.  Cut a card base with a flap on top that is 1/4" to 1/2".  I like to do the Glad Press and Seal technique.  What Jennifer McGuire did new is use one of the self sticky mats to hold the flowers. Either way the cards come out beautifully.  
stamp/die/stencil used:  GinaKdesigns Little Hello layering stencil bundle


You can see videos over at Jennifer's blog or you tube channel.

Thanks for stopping by.  Come back soon.

Monday, March 4, 2024

4 Corners

 4 Corners

I call this technique 4 corners.  You might know a better name ... if so please leave a comment, and let me know.

stamps/stencils used: Gina K Designs Zinnia stencil set, Penny Black Friend builder sayings, Catherine Pooler inks

This is a fun technique where you cut a full sheet of 8 1/2 x 11 cardstock into 4 equal pieces. I have lots of pictures to show you today.

Here you can see the Zinnia stencil I used, and the cardstock cut into 4 pieces.
I used my Misti sticky mat to hold the 4 pieces of cardstock in place.  Next place the stencil on the center of all 4 pieces of cardstock.
Color in the stencil.  Once you separate the 4 pieces of cardstock you can see how the images is in the 4 corners ... hence my name for this technique.
Turn the cards so you have section of the cards with no image in the center.  Place the stencil again in the center of the 4 pieces of cardstock, and color.
Turn the 4 pieces of cardstock again, so there is empty section in the center.
Keep repeating the turning of the cardstocks until all sections (corners) of the cards are stenciled. 

If you click on pictures you can see that I numbered them in order of the stenciling.
When all the stenciling is done on all the corners of the cards, you can now add the extras.  I added the leaves to each card afterward. You can also see I used my favorite CP inks.
I die cut the stenciled cards to finish them.  Oh, did I tell you, with this technique you get 4 cards when you are done.
I first saw this technique on Jennifer McGuire you tube channel. It's fun, and as I mentioned you get FOUR cards when you are done!  

Thanks for stopping by.  Come back soon.


Friday, February 9, 2024

Zinnia

 Zinnia

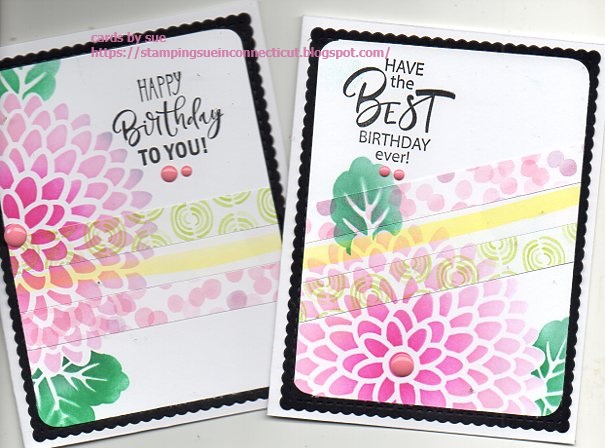
When making cards I have found that stencils are good tools, as you can see in the pictures.

stamps/stencils used:  Gina K Designs Zinnia stencil, Gina K/Unity stamp co.(sayings) collaboration 

I first adhered three strips of pattern papers onto a layer of white cardstock.  Next I decided to see what it would look like, if I stenciled over the strips.  And I liked it!  So I did a few cards doing this technique.  I'm sure someone else has done this before, but it was a new thing for me.  I think in the future when I do this I will use bolder pattern papers so they don't get lost in the design.

For the card above I did the full stencil over the strips of pattern papers.  The Zinnia flower hides most of the strips but that is ok, because I really like this stencil design.  Don't you?

Thank you for stopping by.  Come back soon.

***not affiliated with companies just a satisfied customer***


Wednesday, December 20, 2023

Joyful cards

 Joyful cards

 Don't look if you are on my mailing list, and want to be surprised. teeheeehee  If you know me, I like to make multiple designs for my Holiday cards.  This year is no different.  Only difference is I did a JOY theme this year on most of my cards.

stamps/supplies:  GinaKdesigns tapestrey stamp set, Altenew stamp co. Joy die/stamps-embossing folder, Sizzix lamp post die

I used gold and white inks on some of them.  Also used embossing folder and embossing powder.  Yes, embossing powder!  If you know me I used embossing powders seldomly.  Anyway hope you like.

Thanks for stopping by.  Come back again soon.


Tuesday, March 21, 2023

Yet more one sheet wonder cards

 One sheet wonder cards

stamps used:  GinaK designs

This is just a short post to show a couple more one sheet wonder cards. 


 It's such a fun, and easy technique, that I can't stop making these cards.  I've been doing this technique off and on for years, in fact, back in the day I was published (magazine now out of business) where I made postcards.  The magazine was Scrap & Stamp Arts November 2005 ... I told you it was back in the day.  If you have this publication you can see my Irresistible postcards ... name given by magazine. 


Wish I had photos but, that was back before fancy phones and all.  I scanned pics from actual magazine so you can see my postcards in all their glory from back in the day.  


Back to today ... you can see more details on this technique here in this post.  

Thanks for stopping by.  Come back again soon.

Friday, March 10, 2023

More One sheet wonder cards

 More One sheet wonder cards

I ended up with five completed stamped One sheet wonder cardstocks. This means a total of 20 cards!  So here are the rest of the cards that I didn't show in my post from February 27th.  

stamps used:  Gina K designs Happy Life, New Beginnings, Always Delightful, Whimsy and Wonder
I had too much fun with this one sheet wonder technique!  Some of these cards have Perfect Pearl spray to add some shine.   To see step by step photos how I created these cards check out this post.  Back in the day I called this technique collage stamping, but whatever you call it it's fun.  To see more on this technique look here, 2009 collage stamping, more collage stamping here.  You can type collage stamping, or one sheet wonders in the search box to find more that I have done.


Sometimes after the stamped one sheet wonder cardstock was cut up it looked better on horizonal or vertical cards.


Some of the cards I added self sticking gems.  Today and always cards are going to be Anniversary cards, once I stamp the inside later.  

Well that's enough of this style card for now.  Hope you like them.

Thanks for stopping by.  Come back soon.


Monday, February 27, 2023

One sheet wonder cards

 One sheet wonder cards

Some of the cards I created have gems or are spayed with Perfect Pearls for added shine.

stamps used:  Gina K designs Happy Life, New Beginnings, Whimsy and Wonder, Always Delightful

I stamped several one sheet wonder sheets.

First I stamped the swirl of stars down the center, and across the center of the cardstock.  Second I stamped the small butterflies in all four quadrants.

Third I stamped the vine and 3 leafery into each quadrant. I think you see the object here ... just make sure each quadrant has all the images.

Fourth has the big flower stamped in each quadrant.
Fifth has all the little image stamped in the quadrants with light green ink.  Once it is all stamped I cut it up into four panels, then I die cut the panels to fit on an A2 card.

Here is another set of cards.
I will do another post showing more cards I created with this technique.
Thank you for stopping by.  Come back again soon.