My stamping adventures

Showing posts with label decorative papers. Show all posts

Tuesday, January 16, 2024

Double delight

 Double delight

Here posting for Blank Page Muse today.  This is a card design I learned years ago to show off decorative papers. First I did the card in a horizontal card, or it is also called landscape. 

It's call Double delight, because it shows off both sides of the paper, as you can see in the photo.  
Here's a close up to show off one side of the paper, and the fun unicorn with all her sparkle.

Next is a look at a vertical or portrait style card.
measurements/instructions:
base (portrait card): 5 1/4" x 5 1/2" - with 5 1/4" side at top of scoring board ... score at 1".
decorative paper: 4 1/4" x 5 1/2"
Cut out base card, then cut off all but an inch of the card for the front of the base card.  If you look at photo you can see where the solid color cardstock ends, and the decorative paper is showing.  Tape the decorative paper to the backside of the 1" section of the card.
This paper pack has lots of great designs to show off on these cards.

                                        stamps and products used on these cards
                                        Blank Page Muse Masquerade paper pack by Pam Bray
                                        Blank Page Muse  Unicorn Wishes clear stamp set by Donna Gray
Blank Page Muse Special day Birthday by Pam Bray
                    Use the code BPMSue for a 15% discount at Blank Page Muse or I Brake for Stamps

Thanks for stopping by.  Come back again soon.


Tuesday, October 10, 2023

Hidden paperclips - video

 Hidden paperclips

 
papers used:  various companies
These hidden paperclips are easy to create, and decorative.  I made a short video to show how I create these hidden paperclips.

As you can see I went a little crazy making these little gems.  I have already given some away.

You can make them in any size or shape you can imagine.  Use big paperclips or small ones.
Thanks for stopping by.  Come back again soon.


Thursday, August 10, 2023

Some easy Folios

 Some easy Folios

Each one of these Folios is just a little different, which you will see in the photos.


Folios can be made in any size, and even shape your imagination will allow.

The can range from skinny to fat ... short to tall ... it all depends on the size of your paper, and the folds you make.


You can even use an envelope maker to create fun envelope style folios.


I think you get the idea after looking at all these photos.  If you would like some general instructions how I created these Folios please look back at my blog.  You can type folios in search bar and they will come up.
Thanks for stopping by and come back soon.


Tuesday, November 29, 2022

Magnolia

Magnolia 

stamps used:  Stampin' Up
Did some simple cards, at least I think they are simple.  Used up some "scrap" pieces of my DSP from Stampin' Up.  Maybe I should call them off cuts instead of scraps, because they are a good size.  Basically what I did was adhere the off cut DSP to the front of an A2 card.  Cut strips of metallic papers I have had for years!  Always thought they were too pretty to use, BUT I am trying to use papers I have been hoarding for years up!!!  Back to the cards, as I mentioned I cut strips of the metallic papers and glued them to the edges of the DSP.  Looks like there is a full piece of metallic paper behind the DSP but there isn't.  Next I stamped the big magnolia flower, and just sponged on some color.  I foam mounted the flower to the card, stamped the saying, and done!  easy peasy, right?!?
Thanks for stopping by, and come back soon.


Thursday, April 8, 2021

Mixed Media w/Friends #1

 Mixed Media w/Friends #1

This idea started when a friend saw someone do this on her you tube channel ...tellHimthanku ... where she is doing mixed media on a jumbo pack of playing cards.  So my friend suggested we do it our way ... so let's get started!

Here is a look at the playing cards we are using:

We bought them at the Dollar Tree store in the toys section.  There are different themes but it doesn't matter the pictures on the cards because we will be doing mixed media techniques on them. 
 Definition of mixed media is In visual art, mixed media describes artwork in which more than one medium or material has been employed. Assemblages and collages are two common examples of art using different media that will make use of different materials including cloth, paper, wood and found objects.

Here is a look at my first playing card:

                                           this is my card - all supplies and stamps listed on the back of the card.

With that being said basically anything goes with mixed media.  For my first playing card I kept it simple, gluing white tissue paper on the card to start and, then went from there. Added some ripped decorative paper, die cut bird/branch, self sticking gems and of course a stamped saying.  We decided to list supplies and stamps on the back for a reference.  


card with bottle is by JAGS

We plan on doing this until we get bored with creating these little works of art.  I have't decided, yet how I will store these cards but I'm sure I will find some type of notebook that will work.

Thanks for stopping by.  come back again soon.


Tuesday, March 30, 2021

Covered notebooks

Covered notebooks

photo #1 mini covered notebooks stamps used:  SU
photo #2 composition notebook DSP: SU
photo #3covered mini and composition notebooks stamps used:  SU, Altenew Birds of a feather

Just had some fun covering mini and regular size notebooks ... some of them composition style and other legal style notebooks.  I got them all at Dollar Tree store so not expensive at all.

Basic instructions:

1.  measure front cover of notebook ... cut DSP (decorative papers) to fit.  you can glue or use any type of double sided tape.

2.  make a pocket inside notebook (see photo #2).  glue a couple of the notebook pages together to make it stronger.....fold down the glued pages to make a diagonal fold.  diagonal fold will create the pocket.

3.  add DSP to diagonal fold pocket. add handstamped cards, bookmarks and tags to the pockets.

4.  I decorated the outsides with butterfly punch, dragonfly die and bird dies from above companies.

thank you for stopping by.  come back again soon.


Friday, July 19, 2019

Flip flap cards


stamps used:  Unity stamp co.

This is called a flip flap card.  It's been around for awhile and it is making a come back.  I've seen it online again so I decided to make a couple of these card designs.
This basically a flat card that doesn't open like a normal A2 card.  The flap layer is the opening of the card.

Measurements:
base card:  5 1/2" x 4 1/4"
pattern paper:  5 1/4" x 4"
flap layer:  1 3/4" x 4 5/8"   score at 1/2"
circle dies:  different sizes

Instructions:
1.  fold on score line of the flap layer and adhere the folded section to the back of the pattern paper.
2.  adhere the flap layer with the pattern paper to the base card.
3.  adhere the biggest circle die to the flap layer but only adhere half of the circle die.
4.  flip the flap layer up, and with a small piece of re-positional tape, add second circle die of the same size to the back of the circle die on the front of the flap.  Add glue/tape to the back of second circle that is attached with re-positional tape.  Next flip the flap down to position the second circle die to the base card.  The second circle die should now be positioned on the base card and when the flap is closed the circle dies should match.
5.  stamp the white circle dies and adhere to the front and inside circle dies.
You are now done with your Flip Flap card and when you flip the front up you will reveal the message under the front flap.

Hope you enjoyed this Flip Flap card as much as I have and make some of your own.  Thank you for stopping by and come back again soon.

Wednesday, December 13, 2017

Yeti for Christmas?

stamps used:  MFT (My Favorite Things)
supplies used:  decorative papers, circle dies, Prisma color pencils
If you are like me you have a baggie full of cardstock scraps and another baggie full of decorative paper scraps.  admit it ... you do ... just like me.  
For these cards I got out those baggies and made some Christmas cards with a new (new to me) stamp set from MFT called Beast of Friends.  I saw it and just couldn't resist it.  
No real dimensions for the cards because I was trying to use up my scraps needless to say I still have full baggies but did use up some of the scraps.  The yeti is colored very simply with Prisma color pencils ... just wanted to add a little color and yes, I did do one of the Yeti's with a green face!  I just had to ... it wouldn't be me if I didn't do something green!  hope you like these easy peasy cards.

Monday, April 24, 2017

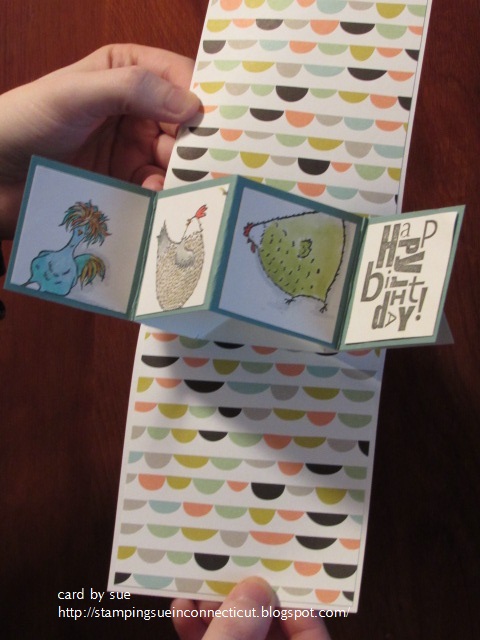
Hey chick pivot cards


I have a couple of still pictures and a quick video showing how this card just pops out!


 stamps used - SU
SU DSP
this card idea has been out for quite a while now but I finally sat down and made a few of these pivot cards!  they are so much fun.  there are a lot of you tube videos out there with all the instructions so I won't bore you with all the same information.  just go out there and have fun!

Wednesday, December 7, 2016

Basic easel card with video

basic easel card
stamps - Unity stamp co.
Sizzix carved ornaments die
Ranger distress inks
DSP by SU
measurements:
base - 4 1/4 x 11
score and fold at 5 1/2 & 2 3/4
front and inside layer - 4 1/4 x 5 1/2
The easel card has been around for years, and has stood the test of time.  This is a card that is just a little more than an ordinary card.  A couple of folds adds that extra touch to make this an extra ordinary card.
watch my video at the end of this post or at Sue Wisniewski - YouTube 
like and share this video with your friends.  you can also give it a thumbs up if you like it.  
thanks,  see you next time.

Thursday, November 24, 2016

Happy Thanksgiving

Happy Thanksgiving to all my friends and family.  I made cards early in the month then forgot so they didn't get sent out till just this Monday.  Hopefully they found their way on time.  I'm thankful all year for my family and friends.  still have those adorable HouseMouse running around that are colored with Prisma color pencils.  the other two designs use decorative pattern papers and punches.

Wednesday, May 25, 2016

Paper sunbursts


If you follow my blog you know I have been using lots of my DSP to make drapery/curtain cards so have lots of strips of DSP soooooo what to do with them?  make more cards ..... so here you go paper sunburst cards using up some of those scraps of DSP.  Also did a little water coloring with the pumpkin image.
Please go to Just For Fun Rubber Stamps blog for stamp details.
Don't forget to check out JFF May challenge: let's hear it for the girls! 

Saturday, April 30, 2016

Drapery fold

Today I decided to jump on the bandwagon with the drapery fold technique. this is going to be added to all my fun folds that I like to do. There are lots of instructions out there if you do a search.  I have two cards to show you today because of the measurements I used on my cards.
pattern paper = 12" x 5 1/2" (cut in half diagonally to give you 2 pieces)
score on the long side of pattern paper at 1", 3" 4", 6", 7", 9", 10" and 11"
next fold the scored pattern paper accordion style and tape it to your card and decorate.  that's all there is to it...if you notice on my two cards the folds are going two different directions that because when I scored the second piece I forgot I wanted to show the other side of the pattern paper.  no biggie ... you know what I always say, "there are no mistakes in stamping just happy accidents!"
card details:
stamps by JustForFun stamps - visit Just For Fun Rubber Stamps for stamp details.
pattern paper/ribbons by SU

Friday, July 17, 2015

July tag

Here's my interpretation of Tim's tag for July which is mainly covering tag with decorative paper then water coloring with distress markers.  couldn't resist using one of the crazy birds again for my tag this month.  don't have all the markers so used what I had so that is why this bird is red....she kinda looks embarrassed doesn't she?  added some Ranger Glossy Accents on her eyes to make them pop more than they already do.  I don't sew sooooo I used Ranger black enamel accents to make faux stitches around my tag.  I know I've mentioned this before that I don't really go into all the metal embellishments so I just got out some of my TH tissue tape to add to the top of the tag then just faux stitched over it.  couldn't resist going into my funny sayings drawer and found this one that I thought worked.
entering in the following challenges:
1.  12 tags of 2015 july - distress water coloring
2.  Crazy 4 challenges - critters
3.  Simon Says Wed. challenge - get in shape
4.  Simon Says Mon. challenge - anything goes
5.  That Craft Place challenge - anything goes mixed media

Friday, October 31, 2014

Happy Halloween 2014!!!

If you are here for MFP blog hop post please click here or scroll down....boooooooo!


It's all Hallooooo-ween night when all the ghosts and goblins come out to play.  Witches, ghosts, and goblins, Oh My!   I don't have any small children anymore (all grown) so I'll be home tonight watching some scary fun on T.V.  The card on the left is what I call a circle closure card and the one on the right with all the scary ghosts is what I call a cut down card but whatever you call them they fit the scene for Halloween night.  all coloring done with Prisma color pencils....what else?  boooooooo!
entered in following challenge:
1.  Craft Hoarders Anonymous - layer it!
2.  SweetStampsBlog - spooky
3.  Divas by design - anything goes
4.  That Craft Place challenge - halloween
5.  Crazy 4 Challenges - C4C259 photo inspiration
6.  Simon Says Wednesday challenge - anything goes
circle closure card details:
stamps - Mark's Finest Papers a Heinrich Co. Home Page
oval punches and Nestabilities circle dies
ribbon

cut down card details:
stamps - Mark's Finest Papers a Heinrich Co. Home Page
Sizzix ghosts die
decorative paper
prisma color pencils

Friday, August 15, 2014

MFP August blog hop - Dear Santa and Brrrr

Welcome to the Marks Finest Papers, a Heinrich Company
August Blog Hop! 
This month's New Stamp Set Releases are

 Featured Aug. 12
Crows and Scarecrow 
Featured Aug. 13
Hydrangea
 Featured Aug. 14
Keys
Featured Aug. 15
Dear Santa and Brrrr


these two cards are on MFP blog.


Please hop along with us! You have a chance to win one of the above stamp sets! Just comment on the following blogs (don't forget this one), each day for more chances to win! (You do NOT have to comment on all the blogs each day! The names are drawn randomly!) All six winners will be announced on 
Aug. 16, 2014 on the Mark's Finest Papers blog. You can go back and comment if you missed a day. (HINT: The more you comment, the more chances you have to win and comments on the MFP blog count twice!) 
The deadline for 
commenting is 10 PM EST on Friday Aug. 15, 2014

I am officially on the first two days of the hop and the last two I'm on my own.  what that means is commenting here today will only be for me but please do because I like to hear what you have to say.
This month my theme is layers!  yes, I'm going to try to put a dent in all the decorative papers I have by using them this month for my cards!  I'll let you know at the end of our hop how I did.  lol!  Well, it's the last day of the hop and I said I would let you know if I put a dent into my stash of decorative papers......NO!  still have a lot more to go.  Maybe I should stop buying them!!!


It's fun to get a jump on making holiday cards!
Used a lot of sparkle and shine on this Santa.


Here's the Design Team: