My stamping adventures

Showing posts with label Rogue Redhead Designs. Show all posts

Sunday, December 29, 2013

Happy Anniversary!


Happy Anniversary to a fun couple!  couldn't resist using this old couple from Rogue Redhead Designs and fun playful saying fromStarvingArtistamps.  I knew this card would be perfect for them because they are such a fun couple and have been together for years and they both have a wonderful sense of humor.  It's an explosion card which I have been having fun with this month.  I will have a tutorial on explosion card in January.
entering in the following challenge:
1.  Stampotique Designers challenge - SDC 128 anything goes

Thursday, July 18, 2013

leftover backgrounds


This is a fun card that I think will be great for an anniversary card maybe for my brother & S-I-L but that's not till October.  Used up some inky backgrounds and more backgrounds I had on my table for this card.  Just feels good to use up stuff that is hanging out on your table.  I did add some stamping to the two pieces for more interest to the finished card. 

entering in the following challenge:
1.  Rogue Redhead Designs blog - get sketchy
 2.  CCEE Stampers - sing a song (She Loves Me, yeah, yeah, yeah by the Beatles)
card details:
stamps - Rogue Redhead Designs Just sayin'
inks - Ranger distress markers and ink pads
Spellbinders Nestabilities circle and scallop dies
Judi-kins mica inks

Friday, April 5, 2013

Happy Birthday to my Dad

This weekend is my dad's 89th birthday!!!  wow!  he always says he has been living on borrowed time since he hit 60!  but if you look back at his family most of them lived to over 80.  Had fun with this card first I die cut old card because the first car I drove was an old blue chevy station wagon.  Not as old as this car but that's o.k.  I won a drawing from Rogue Redhead Designs and got this fun stamp set with this old man with fun sayings of course that really isn't what my dad looks like but still fun. 
entering in following challenges:
1.  Simon Says Stamp Challenge - happy birthday
2.  Simon Says Stamp and Show - anything goes
3.  Rogue Redhead Designs blog - sentimental focus
card details:
old fashion card Sizzix alterations die
circle dies from Spellbinders Nestabilities
stamps - Rogue Redhead Designs
prisma color pencils

Friday, March 15, 2013

Faux shaker

I first saw this style shaker here and thought what a great idea!  I call it a faux shaker because the confetti doesn't move around a lot but it is still like a shaker.  It is held together with washi tape!!!  what a creative idea.  A regular shaker is cut out of foam core or mounted with a couple layers of mounting tape so there is space in there for the confetti to really shake.  Oh yeah, Happy St. Patrick's day a couple of days early.
entering this in the following challenge:
1.  Rogue Redhead Designs blog - #21 Sentimental Focus
card supplies:
window plastic, confetti
washi tape


Saturday, February 23, 2013

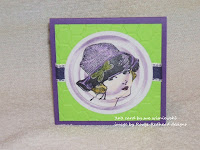
3x3 notes

I started out doing the telescoping card (from memory) on Splitcoaststampers but didn't work out so just took pieces I die cut and did it my way.  Still worked with but don't think it is as dramatic as if I followed directions correctly but you know what I always say to my students....there are no mistakes in rubber stamping just happy accidents.
 
entering in the following challenges:
1.  Rogue Redhead Designs blog - 3 x 3 cards
2.  CCEE Stampers - "C's" (circles, cardstock, color pencils)
card supplies:
honey comb embossing folder by Sizzix
ribbon by SU
Prisma color pencils
***I won the drawing! I will be collecting my prize soon. can't wait!***

Thursday, September 6, 2012

Herringbone ribbon bookmark

Check out this bookmark I created.  I did the herringbone technique but instead of using strips of decorative papers I used ribbons that I won in a drawing from Really Reasonable Ribbons .  I made a flower bow with the same ribbons that I folded and arranged together.  The image is from a plate of rubber by Rogue Redhead Designs . 

entering this in the following challenge:
1.  Rogue Redhead Designs blog - shapes: circle, rectangle, square
2.  Really Reasonable Ribbon's Ramblings! - back to school

Saturday, July 21, 2012

Ladies in green

Was playing around with new Dylusion sprays and the one stencil I bought a month or so back.  Got three of the sprays: a green, yellow, blue and I used all three of them on this tag.  Then I stamped three ladies from Rogue Redhead Designs and colored them in with Prisma color pencils....used two greens.
Die cut Spellbinders Nestabilities ovals....plain and fancy then mounted on tag.

Entering this card in following challenge:
1.  Rogue Redhead Designs blog - distress in green
2.  Fashionable Stamping Challenges - challenge #26 Let's Get Messy and ink

Wednesday, May 30, 2012

3 Ladies easel card

I do like to make easel cards (please click on links to see more cards)whether they stand straight, twistedBIGdouble or even triple. This one I used Spellbinders Nestabilities ovals to cut out the image.  The background on this card is a fun one......I call it Stain Splats.....I'll tell more about it at a later time.  All images on this card are from Rogue Redhead Designs .

Friday, March 9, 2012

Just a card

Here is a card I made with left over pieces on my table.  Background is an embossed piece of cream card stock next added a couple of strips of May Arts sheer ribbon that was laying around.  You might remember last year I took a class with Jennifer McGuire using Hero Arts stamps and lots of inks well.......the die cut piece is one of the Distress stains I did here at home after the class and never used in a card till now.  The oval piece is stamped with Rogue Redhead Designs fashion ladies and colored in with Prisma color pencils.  that's it....enjoy!

Sunday, February 26, 2012

Ordinary masking tape

I learned this masking tape technique years ago when I was working at a stamp store but for the life of me can't remember who did it.  It probably has a name but I don't know so I will just tell you what I did with masking tape.  First went into my scrap pile and pulled out pieces of cardstock, it doesn't matter what color because it will be covered with masking tape.  Rip pieces of masking tape and layer it all over the cardstock....cover the whole piece of cardstock.  Next add color to masking tape with any of your stamping ink pads.  I pulled out some colorbox pigment and chalk ink pads then just did DTP (direct to paper) technique.  When I had all the color I wanted I sprinkled clear embossing powder on it then heat embossed it.  Didn't really like it so then I went into my draw of embossing powders and got out some colored embossing powders.  On my actual card I used Ranger peeled paint embossing powder which gave a rustic feel to it.  On samples pieces I used Hologram embossing powder which added sparkle...you would think it was glitter but it's not.  Back to my card....had trouble getting Rogue Redhead Designs fashion ladies to stick to card so I got out my trusty Spellbinders Nestabilities and cut out an oval then had no trouble mounting ladies that I had touched up with Prisma color pencils.  Cut out a banner, stamped saying from same set of Rogue Redhead Designs with VersaFine sienna ink. 
Entering in following challenges:
1.  Gingersnap Creations - spicy supply challenge #GC138:  masking tape
2.  Moving Along With The Times - more than two layers

Saturday, February 25, 2012

Ladies of fashion

I've said it before and I'll say it again "how did I ever get along without die cuts to make perfect ovals and circles!"  This card is no different using Spellbinders Nestabilities ovals and scallop ovals.  Check out the background on this card I did a technique that a friend loves to do......stamp on pattern paper for more dimension.  See those ladies of fashion .... they are from Rogue Redhead Designs as well as all the stamps in the background.  Of course I got out my Prisma color pencils to add color to those lovely ladies, added some ribbon and self sticking crystals to finish off this card.
Entering this card in the following challenges:
1.  Rogue Redhead Designs blog - Rebel challenge #8 stamped background
2.  SweetStamps BLOG - BINGO used die cut, ribbon, bling
3.  The Pink Elephant - print it

Wednesday, January 4, 2012

2012 is here!

All is quiet here but the thermometer reads 12 degrees outside!!! Brrrrrrrrrrrrr it's cold outside so guess it is a good time to curl up on the couch with a good book to read or get out your Ranger Distress Stains and just make stripes on cardstock then stamp Rogue Redhead Designs saying/children on swing with archival black ink.  Cut out main image with Spellbinders Nestabilities dies and add to card that was embossed with one of  Sizzix embossing folders.  Stamp saying and free cut banner. 
Happy New Year!
Stamp It!  Use It!  Create It!

Thursday, December 29, 2011

Who has style?

Think this will be my last tag for awhile, will be getting back to card making which is my preference.  Did wrinkle free distress technique which is where you put Ranger Distress inks on craft sheet, spritz with water but in this case I used Perfect Pearls mist for extra shine.  Press tag into the inks to color it.  Dry with heat tool then next do a cool thing ....... drop droplets of water onto distress colored tag to make these great water spots which I call faux bleach spots.  To find out more about these two techniques go to Tim Holtz blog.  Back to my tag........stamp Rogue Redhead Designs lady directly onto tag with any good black ink then stamp and cut out same lady with brown ink on separate cardstock and mount to tag with foam mounting tape.  Make a simple but fun Tim Holtz tissue tape flower, add scrabble piece just for fun and Rogue Redhead Designs saying then fibers and you are done.
Entering this tag in these challenges:
1.  Studio L3 - grungy monday - use tissue tape or tissue wrap
2.  Simon Says Stamp and Show - tag Tim style

Tuesday, December 27, 2011

She who travels the world

Still in tag mode from Tim tags so here is yet another in his style.  Did wrinkle free technique where you put different colors of Ranger Distress inks on craft sheet, spritz with water or in this case I used a Ranger Perfect Pearls mist to give it some extra shine.  Press tag into all the inks, allow to dry or heat set with heat tool.  Stamp Rogue Redhead Designs swirl randomly on tag.  Die cut Sizzix alterations old jalopy car then run it through Big Kick with one of the alterations embossing folders.  Use blending tool to add color then run distress ink pad lightly over the the jalopy.  Add some distress rock candy stickles and prisma glitter just for the fun of it.  Cut off the windows to make it a convertible then mount it to tag with foam mounting tape.  Stamp Rogue Redhead Designs lady on kraft cardstock with VersaFine sienna ink, cut her out and tape her where the windows of the jalopy would be to have her travelling all over the world.

Entering this tag in following challenges:
1. Fashionable Stamping Challenges - Challenge #11 – Travelling Around The World
2. Simon Says Stamp and Show - Tim style tag

Tuesday, December 20, 2011

Get Griddy

Here is my take on Rogue Redhead Designs blog "let's get griddy" challenge.
  Learned this technique years ago watching a demo at a convention where the demo artist use post it notes and Marvy square ink pads.  I was never a big fan of those ink pads but way back when loved my stipple brushes so got them out!  So post it notes and stipple brushes in hand I made this grid card using Rogue Redhead Designs Relish Reading stamp set.  Also got out my trusty Ranger Adirondack ink pads!  yes, going old school here and it is fun to go back to my old ways.

Monday, December 19, 2011

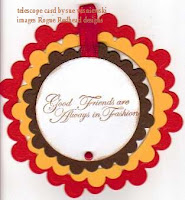
Yellow, Red and Brown - Up scope!

I'm still making telescope cards and this one I'm entering Gingersnap creations GC128: Color Challenge - Yellow, Red and Brown challenge here.  All images on this telescope card are from Rogue Redhead Designs.  Normally I stamp images in black but since this was a color challenge I decided to use one of the assigned colors to stamp images. 

Saturday, December 3, 2011

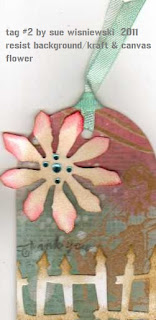
12 Days of Tags - day 2

12 Days of tags - day 2
I went in a completely different theme then TH with his christmas tags.  The reason for my variation on the theme is a new set of stamps I just received in the mail last night from Rogue Redhead Designs that I was lucky enough to win a drawing here on her blog.  For this tag TH used his kraft resist paper, I don't have any so I made my own.  First I stamped girl and swirl with clear embossing ink onto a kraft and cream tags....sprinkled with clear embossing power, heat embossed.  Next stamped word background with permanent black ink, wiped off black ink from the embossed images.....stamped thank you (Impress stamps) with black ink.  Next thing I did was to spray some Ranger Perfect Pearls mist into my hand then drop droplets onto tag......ooooops forgot to tell you about blending Ranger Distress inks onto tag first before PP mist......back to PP droplets on tag, heat with heat tool to dry.  Die cut Sizzix spooky fence, distress the edges of fence with Distress gathered twigs ink and adhere to tag.  Lastly the die cut Sizzix Tim Holtz alterations Tattered flower out of sticky back canvas on cardstock for stability.  Ink the edges of flower with Distress festive berries and gathered twigs and mount onto tag with foam mounting tape.  Add some May Arts white ribbon that I colorized with Distress ink to finish off tag.