My stamping adventures

Showing posts with label card. Show all posts

Sunday, May 10, 2026

Pattern clash

 Pattern clash

This week for Jen Rzasa Tuesday #altenewchallengelive with the theme pattern clash.  Create a project using two or more patterns that would not normally go together, and make them work beautifully. Play with color, scale, and placement to bring harmony to the mix. 

For my card I used cardstock, fabric tape, pattern paper, stamping, and pitcher cut out with metallic cardstock. The kraft carstock was embossed with an embossing folder. 

I also had to make a tag, because that's me.  I do like my tags.  I punched out different size circles with several pattern papers, and glued them to the top of this oversized tag.  I added a scallop black circle.  The bottom of the tag was embossed with an embossing folder.  I also glued on a strip of washi tape, and ribbon below all the paper circles.  I made what I call a funky house.  That just means it is created with different papers, and cardstocks.

Saturday, January 31, 2026

Lots of texture

 Lots of texture

It's time for Jen Rzasa Tuesday Texture take over #altenewchallengelive .  For my card I used Altenew Woodland path bundle which is an embossing folder and stencil set.  Embossing folders add texture all on their own, but with set it has a stencil set to add color.  Besides color there is stickles glitter glue, and ribbon for more texture...along with foam tape on the back of the panel for more added texture.  Also on this card there is a strip of cardstock with enamel dots, and a saying that is also popped up with foam tape.


My tag uses Altenew Painted jellyfish stamp/die set.  First the tag has blended ink on it, next pattern papers that I cut waves, and glued onto the tag.  Mounted jellyfish with foam mounting tape.  Stamped sayings with black ink, next added enamel dots, and stickles glitter glue for more texture, and of course, sparkle.


Thank you for stopping by.  Come back soon.

Sunday, July 13, 2025

Abacus

 Abacus

An abacus, also called a counting frame, is a hand-operated calculating tool which was used from ancient times, in the ancient Near East, Europe, China, and Russia, till largely replaced by handheld electronic Calculators, during the 1980s.  Why the lesson in an abacus, because Jen Rzasa latest Altenew #altenewlivechallenge theme is Time Travel.  

supplies used:  Altenew Abacus die, Delicate magnolia die set

I used the abacus because it goes way back in time.  The magnolia flower was just to dress up the abacus.

Thanks for stopping by.  Come back soon.


Thursday, March 28, 2024

Wildflower, Yikes!

 Wildflower, Yikes!

Check me out over Blank Page Muse blog today with a pop up, or it can be called a pop out card.


Once you do one of these cards you will be addictive to this card design. 
The wildflower is unique, and quirky along with the fun pattern paper.  Of course, with this quirky flower I just had to use a bright green ink to show it off.
First I wrote up these measurements for the pop up mechanism. Next I drew pictures to go along with my notes.
Measurements/Basic instructions:
1.  On A2 card 4 1/4" x 5 1/2" adhere pattern paper.
2.  die cut out section.  save cut out shape to adhere to pop up mechanism later.
3.  cut strip of cardstock 1 1/2" x 4"  score at 1", 2", 3".  fold on all scores.

4. on folded strip add glue (or favorite adhesive) to one of the sections with glue on the inside of the card at the fold.  see template/notes #2 drawing.  When card is closed you can see the strip through the opening.  Open card and fold the strip in half. see template/notes #3 drawing.  Put glue (or favorite adhesive) above fold of card.  see template/notes #3 drawing.  Close card to attach pop mechanism to card. 

 Next adhere die cut shape you saved from before to the pop up mechanism when card is closed.  Good idea to stamp/decorate the die cut shape before adhering to pop up mechanism.  Finish decorating to complete the card.

stamps/products used:
Blank Page Muse Wildflower, Yikes stamp set by Monique van Dijk
Blank Page Muse Cyan Corsortium paper pack by Pam Bray
I Brake for stamps Harvest Love (saying) stamp set

Thanks for stopping by.  Come back again soon.


Monday, March 18, 2024

Meadow Reflections

 Meadow Reflections

Unfortunately we need sympathy cards, so I decided to make a few to have on hand.

stamps used:  Altenew Meadow reflections stamp set, MFP stamp co. saying

Instructions:

1.  Make a reverse circle mask. 

2. Place post it notes over half of the circle mask.  Lay down cloud stencil and add color.  Remove post it notes and replace on other half of mask.  Now blend (in this sample) green ink, then put strips of masking paper over green ink.  Blend same green ink but darker over strips.  Remove strips and see the results.

3.  Remove circle mask to reveal.

4.  Stamp image in black ink over the inked circle.  Add sentiment.

5.  Layer stamped piece on black layer and green A2 card.

Thanks for stopping by.  Come back soon.

Saturday, March 16, 2024

Violets back fold card

 Violets back fold card

I'm on I Brake for Stamps blog today showing the back fold card.


This is a fun, and unique fun fold card that I saw on Rachel Tessman you-tube channel, and fell in love with the design.  

This beautiful violet stamp from I Brake for stamps co. stamps up beautifully even with a color ink.  Here I used a dark blue ink to match the pattern paper colors.
Measurements

base card: 5 1/2" x 7 1/4"  scored at 1 1/4" & 4 1/4"

Layers: pattern paper front 2 3/4" x 5 1/4" (front)

2 3/4" x 5 1/4" (inside left side)

1" x 5 1/4" (back fold-right side)

Use mounting tape to mount image on back fold (right side) of the card.  BUT only put mounting tape on right side of image otherwise you will tape the card closed ... and you don't want that.  teeheeheee

See another back fold card here.

stamps and products used:

I Brake for stamps Violets Jumbo clear stamp set

Cyan Consortium paper pack by Pam Bray


Thanks for stopping by.  Come back again soon.


Monday, February 26, 2024

A Rose is a Rose

 A Rose is a Rose

“Rose is a rose is a rose is a rose” is a sentence/quotation from a poem called “Scared Emily” by Gertrude Stein. Didn't know you were going to learn something today about poetry, did you? 

stamp/supplies: Altenew Darling Rose stamp/die set, Unity stamp co. scallop/stitched die set

For this card I die cut the layers with scallop/stitched die set, then added a stamped background(don't remember the name) from my stash. Stamped, blended some color on rose, leaves, then die cut it, and adhered the rose to black die cut oval.  Adhered the rose piece on the background, then added a stamped saying with brads to the card.

Thanks or stopping by.  Come back soon.

***not affiliated with above companies just satisfied customer***


Thursday, February 22, 2024

Rocker card

Rocker card

Another fun fold card that is FUN, and interactive.

stamps used: Catherine Pooler Take a peek stamp set

This is an easy interactive card.  

Instructions:

1. cut out circle die.  I used a 5" circle die.

2.  fold the circle die in half. That's it for this card.

Next all you do is decorate it. When it stands up it rocks back and forth.  

Here is one of my first rocker cards back in 2013.

You can look on pinterest or you-tube to see it rocking.

Short but sweet post.

Thanks for stopping by.  Come back soon.

Monday, February 12, 2024

Decorative florals

 Decorative florals

Lately, I like to fool around with embossing folders. Here I used one of my favorites from Altenew stamp company, called Decorative Florals 3D embossing folder.
                    stamps/supplies used:  Altenew 3D Decorative florals embossing folder

I ran the 3D embossing folder thru my Big Kick (yes, I still have and use old Big Kick die cutting machine) on white cardstock.  These 3D embossing folders create wonderful pressed out images.  For this one I spot colored with my Catherine Pooler inks.  The little Hi was from an Altenew stamp set I have in my stash. I layered the embossed card onto a black layer, then onto a salmon colored A2 (4 1/4" x 5 1/2") card.  Simple, but I think effective, and unique card.

Thanks for stopping by.  Come back soon.

***not affiliated with any of above companies just satisfied customer***


Saturday, July 1, 2023

Vroom!

 Vroom!

Something I don't do a lot ... a masculine style card.

stamp set used:  Unity  stamp co.Vroom big background

basic instructions:

Stamp big background image on white cardstock.  Colored the bus with my prisma color pencils.  Die cut with Unity stamp co. mini scallop rectangle die set.  Die cut mini scallop with black cardstock, layer stamped image on this black card.  Adhere this piece to turquoise A2 (4 1/4" x 5 1/2") card.

This is what I call a simple card because there isn't a lot of coloring.  Just simple details with the spotlight coloring technique, and a little die cutting of frames.

Thanks for stopping by.  Come back again soon.


Tuesday, April 11, 2023

Painted poppies

 Painted poppies

Had a left over piece of white cardstock ... so what do you do?  STAMP IT!  

SU Painted poppies stamp set

I stamped the outline poppies several times on the white card.  Next I stamped the splatter stamps from the same stamp set in the light blue, and yellow/orange inks.  Then die cut the stamped piece, and black card with Unity stamp co. rectangle scallop/stitched dies.  The light blue cardstock was just cut on guillotine cutter.  Stamped the edges of the top folded card with the same splatter images.  Adhered the stamped layered card to front of card.  Added a thinking of you die for the saying.

You will be seeing more cards with this stamp set.  It's not a new one just haven't been giving it any love lately.

Thanks for stopping by.  come back again soon.

Friday, January 20, 2023

Kokopelli

Kokopelli

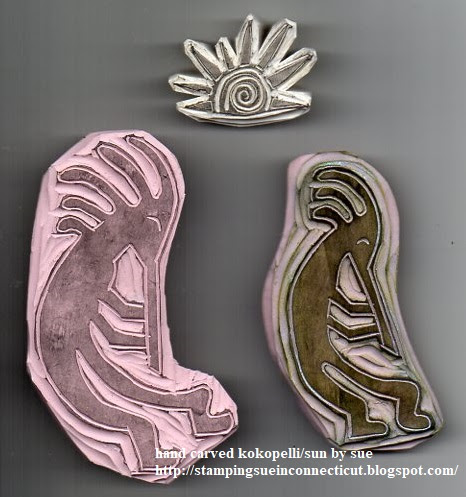
Years ago I carved lots of different images.  This kokopelli and sun are just a couple of the many stamps I carved.

                                                            stamps used:  My carvings

For this card I blended some colors to make it look like a sunset. To fancy up this card, I die cut it out with a postage stamp style die. 


 Kokopelli represents story, growth, joy, and more to the people native.   

                                                        January 15, 2023 sunset - my photo

I took this photo around 5 p.m. the other night.  

Thanks for stopping by.  Come back again soon.

Sunday, July 10, 2022

Christmas in July

 Christmas in July

stamps used:  Catherine Pooler stamps/dies


Here is my card for my local stamp group for July 2022.  Yes, it is Christmas in July!  I did partial stencil on the side of the panel, then stamped the pine cones, and saying in brown ink.  A simple card, but I like it, because it will be easy to duplicate later in the year, when I need more Christmas cards. 

Short post today ... just wanted to show a card.

Thanks for stopping by and come back again soon. 

Wednesday, June 15, 2022

Gel plate printings

 Gel plate prints!

This post is going to have lots of photos.

stamps used:  Hot Potatoes --- die: Unity stamp co. Thinking of you

Gel printing is a fun process but can get very messy.  


Above is a photo of a print being pulled off the gel plate.


The prints showing are either on 80 lb. cardstock, or Rice paper.  Rice paper is very thin, so when I added to a card I needed to back it onto cardstock.


I die cut some of the prints that I created.


I have lots of prints ... so I will be making lots of cards.  Think I might even add a few of these prints into Treasure books I have created just for fun.

Thanks for stopping by.  come back again soon.


Sunday, June 5, 2022

Punch Art

 Punch Art

Believe it or not but NOT one stamp got inky for this card!  

What is Punch Art? It's craft projects made from paper punches you already have. Everything is made from basic shapes. It's fun and easy and it takes very little time. Takes little time once you decide what you are doing.

Paper Punches used:

tag, scallop circle, various circle punches, mini flower, and SU word window punch.

The background for the card uses a cloud stencil for the sky.  The ground was just color sponged with post it notes used as straight line mask.  The layers were cut out with Unity stamp co. rectangle scallop/stitched dies.

Thanks for stopping by and come back again soon.

Wednesday, May 18, 2022

Simple card design

 Simple card design

stamps used:  Stampin' Up

This is a simple design card I did for my creative card swap gals a couple of months ago.  I had computer trouble back then so I'm just getting around to posting it.

I used a two step stamp set from Stampin' up, which really makes this a simple card design.  I stamped the detail bird image first, then the solid color second.  As you can see this is not supposed to be perfect.  The solid image is made to be uneven.  Looped a piece of ribbon behind the image, and stamped the saying underneath to the side.

thanks for stopping by and come back again soon.

Tuesday, February 15, 2022

Twisted gatefold

 Twisted gatefold

stamps used:  GinaKdesigns Always Delightful

This card is a fun fold with a twist on the gate fold card.  This card size does need a handmade envelope because it is an unusual size.  I use my envelope maker to make different size envelopes.

Measurements:

base card: 9" x 6"  - score at 3" and 6"

layers:  (3) light blue 5 1/2" x 2 3/4"

pattern paper: (3) 5 1/4" x 2 1/2"

inside: 5 3/4" x 2 3/4"(color layer)

5 1/2" 2 1/2" (white)

diagram how to fold card

Once you make one of these cards it will be easy peasy.  It's just a matter of going for it, and folding on the score lines in the same directions as you see my diagram.

Thanks for visiting and come back again soon.

Wednesday, November 10, 2021

Double easel step fun fold

 Double easel step fun fold card

 
stamps dies used:  Altenew stamp co.

This fun fold card has been around for years ... this one just has an added a full size card to the back instead of just a panel to write or add saying.  

Measurements:

base accordion card:  4 1/4" x 11"  score at 5 1/2" and 2 3/4"

inside card:  4 1/4" x 11" score at 5 1/2"

Accordion fold base card, then add folded card to the back of accordion folded card.  Add pattern papers to panels of accordion card and die cuts to front of card.  Stamp inside card with saying and add pattern paper strip plus dies as desired.  You will be seeing more of this style card soon.

Thanks for stopping by and come back again soon.

***not affiliated with above company just happy customer***


Sunday, August 8, 2021

August Creative card crew card

August Creative card crew card 

stamps/stencils/dies used: Gina K. Designs kit

This is as stated above my Aug. 2021 sketch card swap card for my local group.  Sketch cards are still out of my comfort zone, but I keep trying.  This sketch was especially difficult for me.
Don't know why but this sketch threw me for a loop.  I finally just turned it horizonal, and hoped for the best.  Not sure I used all the layers correctly ... but ... they say a sketch is just used for a jumping off point!  It is what it is!  On to next months theme which if I remember without looking at my list ... is ... fun fold. NOW that is in my comfort zone and up my alley!!!
Thanks for stopping by.  come back again soon.

Monday, June 7, 2021

Sandpipers on the beach

 Sandpipers on the beach

stamps used:  Just For Fun and Dina Wakley 

The theme for my local creative card crew this month (June) is Beach.  Beach theme for this month is appropriate because it has been so hot around here all week, although it is not officially summer till June 21st.  Anyway back to my card and what I did to make this card.

basic instructions:

1.  I cut out masks to lay down on my white card layer to create what I call faux layers.  The faux layers make the illusion of sand, water and sky.  

2.  Lay down the mask and blend color ... blue for sky and water...kraft color ink for the sand then remove the mask.

3.  Stamp over the faux layers with the birds, weeds and saying.

4.  Die cut the stamped layer with wonky rectangles die then layer all the layers onto a kraft card base.

5.  Add a few gems to finish off the card.

Thank you for stopping by.  come back again soon.